
本文教你如何在 Ubuntu 16.04 上安装 Apache、PHP、MySQL、PureFTPD、BIND、Postfix、Dovecot 和 ISPConfig 3.1 搭建一个 网站、邮件、邮件列表、DNS和FTP服务器。ISPConfig 3是一个虚拟主机控制面板,使您可以通过网络浏览器配置以下服务:Apache 或 nginx web 服务器,Postfix 电子邮件服务,Courier 或 Dovecot IMAP/POP3 服务,MySQL,BIND 或 MyDNS 域名服务,PureFTPd,SpamAssassin,ClamAV,等等和更多的服务。
注意:本教程中使用的ISPConfig 3.1版目前正处于测试状态下,ISPConfig 3.1 最终将在2016年6月发布,旧的 ISPConfig old stable 3.0.5p9 无法在 Ubuntu 16.04 中使用,而且不兼容PHP 7。
1.初步说明
在本教程中,使用的IP地址为192.168.1.100和网关192.168.1.1主机名server1.example.com。这些设置可能与你的不同,所以你必须根据你的情况更换。进一步讨论之前,你需要有一个基本的最小安装。
2. 编辑 /etc/apt/sources.list 并更新 Linux。
编辑/etc/apt/sources.list。注释掉或从文件中删除安装光盘,并确保库启用。应该是这样设置:
nano /etc/apt/sources.list
内容如下:
#
# deb cdrom:[Ubuntu-Server 16.04 LTS _Xenial Xerus_ – Release amd64 (20160420)]/ xenial main restricted
#deb cdrom:[Ubuntu-Server 16.04 LTS _Xenial Xerus_ – Release amd64 (20160420)]/ xenial main restricted
# See http://help.ubuntu.com/community/UpgradeNotes for how to upgrade to
# newer versions of the distribution.
deb http://de.archive.ubuntu.com/ubuntu/ xenial main restricted
# deb-src http://de.archive.ubuntu.com/ubuntu/ xenial main restricted
## Major bug fix updates produced after the final release of the
## distribution.
deb http://de.archive.ubuntu.com/ubuntu/ xenial-updates main restricted
# deb-src http://de.archive.ubuntu.com/ubuntu/ xenial-updates main restricted
## N.B. software from this repository is ENTIRELY UNSUPPORTED by the Ubuntu
## team, and may not be under a free licence. Please satisfy yourself as to
## your rights to use the software. Also, please note that software in
## universe WILL NOT receive any review or updates from the Ubuntu security
## team.
deb http://de.archive.ubuntu.com/ubuntu/ xenial universe
# deb-src http://de.archive.ubuntu.com/ubuntu/ xenial universe
deb http://de.archive.ubuntu.com/ubuntu/ xenial-updates universe
# deb-src http://de.archive.ubuntu.com/ubuntu/ xenial-updates universe
## N.B. software from this repository is ENTIRELY UNSUPPORTED by the Ubuntu
## team, and may not be under a free licence. Please satisfy yourself as to
## your rights to use the software. Also, please note that software in
## multiverse WILL NOT receive any review or updates from the Ubuntu
## security team.
deb http://de.archive.ubuntu.com/ubuntu/ xenial multiverse
# deb-src http://de.archive.ubuntu.com/ubuntu/ xenial multiverse
deb http://de.archive.ubuntu.com/ubuntu/ xenial-updates multiverse
# deb-src http://de.archive.ubuntu.com/ubuntu/ xenial-updates multiverse
## N.B. software from this repository may not have been tested as
## extensively as that contained in the main release, although it includes
## newer versions of some applications which may provide useful features.
## Also, please note that software in backports WILL NOT receive any review
## or updates from the Ubuntu security team.
deb http://de.archive.ubuntu.com/ubuntu/ xenial-backports main restricted universe multiverse
# deb-src http://de.archive.ubuntu.com/ubuntu/ xenial-backports main restricted universe multiverse
## Uncomment the following two lines to add software from Canonical’s
## ‘partner’ repository.
## This software is not part of Ubuntu, but is offered by Canonical and the
## respective vendors as a service to Ubuntu users.
# deb http://archive.canonical.com/ubuntu xenial partner
# deb-src http://archive.canonical.com/ubuntu xenial partner
deb http://security.ubuntu.com/ubuntu xenial-security main restricted
# deb-src http://security.ubuntu.com/ubuntu xenial-security main restricted
deb http://security.ubuntu.com/ubuntu xenial-security universe
# deb-src http://security.ubuntu.com/ubuntu xenial-security universe
deb http://security.ubuntu.com/ubuntu xenial-security multiverse
# deb-src http://security.ubuntu.com/ubuntu xenial-security multiverse
然后运行:
apt-get update
更新apt软件包和数据库:
apt-get upgrade
安装最新的更新(如果有的话)。如果你看到一个新的内核被安装作为更新的一部分,重新引导系统:
reboot
3.更改默认的shell
dpkg-reconfigure dash
Use dash as the default system shell (/bin/sh)?
如果你不这样做,ISPConfig安装会失败。
4.禁用 AppArmor
AppArmor的是一个安全扩展(类似于SELinux)的应提供扩展的安全性。在我看来,你不需要它来配置一个安全的系统,它通常会导致更多的问题比优点(想想看你做了一个星期后,故障排除,因为预期有些服务不能正常工作,然后你发现一切正常,只是AppArmor配置是造成问题)。因此,我禁用它(这是必须的,如果你想稍后安装ISPConfig)。
我们可以像这样禁用它:
service apparmor stop
update-rc.d -f apparmor remove
apt-get remove apparmor apparmor-utils
5.同步系统时钟
这是当你运行一个物理服务器系统时钟在互联网上的NTP(网络时间协议)服务器同步是一个好主意。如果你运行一个虚拟服务器,那么你应该跳过此步骤。 运行:
apt-get -y install ntp ntpdate
和你的系统时间就会始终保持同步。
6. 安装 Postfix, Dovecot, MariaDB, phpMyAdmin, rkhunter 和 binutils
对于安装postfix,我们需要确保的sendmail未安装和运行。要停止并删除sendmail的运行以下命令:
service sendmail stop; update-rc.d -f sendmail remove
错误信息:
Failed to stop sendmail.service: Unit sendmail.service not loaded.
确定的,它只是意味着没有安装sendmail的,所以没有什么被删除。
现在我们可以安装Postfix,Dovecot,MariaDB(如MySQL的替代品),rkhunter和binutil用一个命令:
apt-get install postfix postfix-mysql postfix-doc mariadb-client mariadb-server openssl getmail4 rkhunter binutils dovecot-imapd dovecot-pop3d dovecot-mysql dovecot-sieve sudo
你会被问以下几个问题:
General type of mail configuration: System mail name:
您使用一个子域作为要为以后的电子邮件域名(例如yourdomain.tld)使用“系统邮件名称为”像server1.example.com或server1.yourdomain.com,域名不是非常重要的。
接下来,打开后缀的TLS/ SSL和提交端口:
nano /etc/postfix/master.cf
取消对提交和SMTPS部分如下: – 添加一行-o
smtpd_client_restrictions=permit_sasl_authenticated,reject 两行设置:
[...]
submission inet n - - - - smtpd
-o syslog_name=postfix/submission
-o smtpd_tls_security_level=encrypt
-o smtpd_sasl_auth_enable=yes
 -o smtpd_client_restrictions=permit_sasl_authenticated,reject
# -o smtpd_reject_unlisted_recipient=no
# -o smtpd_client_restrictions=$mua_client_restrictions
# -o smtpd_helo_restrictions=$mua_helo_restrictions
# -o smtpd_sender_restrictions=$mua_sender_restrictions
# -o smtpd_recipient_restrictions=permit_sasl_authenticated,reject
# -o milter_macro_daemon_name=ORIGINATING
smtps inet n - - - - smtpd
-o syslog_name=postfix/smtps
-o smtpd_tls_wrappermode=yes
-o smtpd_sasl_auth_enable=yes
 -o smtpd_client_restrictions=permit_sasl_authenticated,reject
# -o smtpd_reject_unlisted_recipient=no
# -o smtpd_client_restrictions=$mua_client_restrictions
# -o smtpd_helo_restrictions=$mua_helo_restrictions
# -o smtpd_sender_restrictions=$mua_sender_restrictions
# -o smtpd_recipient_restrictions=permit_sasl_authenticated,reject
# -o milter_macro_daemon_name=ORIGINATING
[...]
注:空格在前面的“-o……”行很重要!
重新启动 Postfix:
service postfix restart
我们希望MySQL监听所有的接口,而不仅仅是本地主机。因此,我们编辑:
/etc/mysql/mariadb.conf.d/50-server.cnf 并注释掉线 bind-address = 127.0.0.1:
nano /etc/mysql/mariadb.conf.d/50-server.cnf
[...]
# Instead of skip-networking the default is now to listen only on
# localhost which is more compatible and is not less secure.
#bind-address = 127.0.0.1
[...]
现在,我们在MariaDB设置root密码。 运行:
mysql_secure_installation
将会被问以下问题:
Enter current password for root (enter for none): <– press enter
Set root password? [Y/n] <– y
New password: <– Enter the new MariaDB root password here
Re-enter new password: <– Repeat the password
Remove anonymous users? [Y/n] <– y
Disallow root login remotely? [Y/n] <– y
Reload privilege tables now? [Y/n] <– y
重启 MariaDB:
service mysql restart
现在检查联网启用。运行:
netstat -tap | grep mysql
输出应该是这样的:
root@server1:~# netstat -tap | grep mysql
tcp6 0 0 [::]:mysql [::]:* LISTEN 5230/mysqld
root@server1:~#
7. 安装 Amavisd-new, SpamAssassin, 和 Clamav
安装 amavisd-new, SpamAssassin, 和 ClamAV, 运行命令:
apt-get install amavisd-new spamassassin clamav clamav-daemon zoo unzip bzip2 arj nomarch lzop cabextract apt-listchanges libnet-ldap-perl libauthen-sasl-perl clamav-docs daemon libio-string-perl libio-socket-ssl-perl libnet-ident-perl zip libnet-dns-perl postgrey
ISPConfig3设置使用的amavisd哪些负载,然后SpamAssassin过滤库内部,所以我们可以停止的SpamAssassin释放一些内存:
service spamassassin stop
update-rc.d -f spamassassin remove
编辑ClamAV的配置文件:
nano /etc/clamav/clamd.conf
修改行:
AllowSupplementaryGroups false
为:
AllowSupplementaryGroups true
保存文件。要开始使用ClamAV:
freshclam
service clamav-daemon start
下面的警告可以freshclam的第一次运行,我们开始clamd的守护程序后,我们更新了数据库被忽略。
WARNING: Clamd was NOT notified: Can't connect to clamd through /var/run/clamav/clamd.ctl: No such file or directory
7.1安装 Metronome XMPP服务器(可选)
Metronome XMPP服务器提供了一个XMPP聊天服务器。这一步是可选的,如果你并不需要一个聊天服务器,那么你可以跳过这一步。没有其他ISPConfig功能取决于该软件。
使用apt安装以下软件包。
apt-get install git lua5.1 liblua5.1-0-dev lua-filesystem libidn11-dev libssl-dev lua-zlib lua-expat lua-event lua-bitop lua-socket lua-sec luarocks luarocks
luarocks install lpc
为 Metronome 添加一个shell用户
adduser --no-create-home --disabled-login --gecos 'Metronome' metronome
下载 Metronome /opt目录并编译它。
cd /opt; git clone https://github.com/maranda/metronome.git metronome
cd ./metronome; ./configure --ostype=debian --prefix=/usr
make
make install
Metronome 现在已经安装到 /opt/metronome.
8. 安装 Apache, PHP, phpMyAdmin, FCGI, SuExec, Pear, 和 mcrypt:
apt-get install apache2 apache2-doc apache2-utils libapache2-mod-php php7.0 php7.0-common php7.0-gd php7.0-mysql php7.0-imap phpmyadmin php7.0-cli php7.0-cgi libapache2-mod-fcgid apache2-suexec-pristine php-pear php-auth php7.0-mcrypt mcrypt imagemagick libruby libapache2-mod-python php7.0-curl php7.0-intl php7.0-pspell php7.0-recode php7.0-sqlite3 php7.0-tidy php7.0-xmlrpc php7.0-xsl memcached php-memcache php-imagick php-gettext
您将看到以下问题:
Web server to reconfigure automatically: <-- apache2 Configure database for phpmyadmin with dbconfig-common? <-- YesMySQL application password for phpmyadmin: <-- Press enter使用以下命令配置 Apache 模块:a2enmod suexec rewrite ssl actions include cgi
a2enmod dav_fs dav auth_digest headers
重启 apache2:
service apache2 restart
如果你想通过ISPConfig创建您的网站扩展.RB Ruby文件,则必须注释掉/etc/mime.types行,运行:
nano /etc/mime.types
[...]
#application/x-ruby                             rb
[...]
service apache2 restart
8.1 安装 PHP Opcode cache
apt-get install php7.0-opcache php-apcu
service apache2 restart
8.2 安装 PHP-FPM
apt-get install libapache2-mod-fastcgi php7.0-fpm
a2enmod actions fastcgi alias
service apache2 restart
8.3其他PHP版本
有可能有一个服务器(通过ISPConfig可选),它可以通过的FastCGI和PHP-FPM运行在多个PHP版本。要了解如何构建额外的PHP版本(PHP-FPM和FastCGI),以及如何配置ISPConfig,请查看本教程:如何使用多个PHP版本(PHP-FPM&的FastCGI)随着ISPConfig3(Ubuntu的12.10)(适用于Ubuntu的16.04为好)。
10.1 安装HHVM(HipHop虚拟机)
sudo apt-get install hhvm
9. 安装 Let’s Encrypt
apt-get install git
cd /opt
git clone https://github.com/letsencrypt/letsencrypt
cd letsencrypt/
sudo -H ./letsencrypt-auto --help
10. 安装 Mailman
apt-get install mailman
按照以下配置:
Languages to support: <-- en (英文) Missing site list <-- Ok之前,我们可以开始Mailman,必须创建一个名为Mailman第一个邮件列表:newlist mailman
root@server1:~# newlist mailman
Enter the email of the person running the list: <-- admin email address, e.g. listadmin@example.com Initial mailman password: <-- admin password for the mailman list To finish creating your mailing list, you must edit your /etc/aliases (or equivalent) file by adding the following lines, and possibly running the `newaliases' program: ## mailman mailing list mailman:              "|/var/lib/mailman/mail/mailman post mailman" mailman-admin:        "|/var/lib/mailman/mail/mailman admin mailman" mailman-bounces:      "|/var/lib/mailman/mail/mailman bounces mailman" mailman-confirm:      "|/var/lib/mailman/mail/mailman confirm mailman" mailman-join:         "|/var/lib/mailman/mail/mailman join mailman" mailman-leave:        "|/var/lib/mailman/mail/mailman leave mailman" mailman-owner:        "|/var/lib/mailman/mail/mailman owner mailman" mailman-request:      "|/var/lib/mailman/mail/mailman request mailman" mailman-subscribe:    "|/var/lib/mailman/mail/mailman subscribe mailman" mailman-unsubscribe:  "|/var/lib/mailman/mail/mailman unsubscribe mailman" Hit enter to notify mailman owner... <-- ENTER root@server1:~#
打开/etc/aliases文件之后...
nano /etc/aliases
添加以下行:
[...]
## mailman mailing list
mailman:              "|/var/lib/mailman/mail/mailman post mailman"
mailman-admin:        "|/var/lib/mailman/mail/mailman admin mailman"
mailman-bounces:      "|/var/lib/mailman/mail/mailman bounces mailman"
mailman-confirm:      "|/var/lib/mailman/mail/mailman confirm mailman"
mailman-join:         "|/var/lib/mailman/mail/mailman join mailman"
mailman-leave:        "|/var/lib/mailman/mail/mailman leave mailman"
mailman-owner:        "|/var/lib/mailman/mail/mailman owner mailman"
mailman-request:      "|/var/lib/mailman/mail/mailman request mailman"
mailman-subscribe:    "|/var/lib/mailman/mail/mailman subscribe mailman"
mailman-unsubscribe:  "|/var/lib/mailman/mail/mailman unsubscribe mailman"
运行:
newaliases
事后并重新启动Postfix:
service postfix restart
最后,我们必须启用 mailman Apache配置:
ln -s /etc/mailman/apache.conf /etc/apache2/conf-available/mailman.conf
这定义别名 /cgi-bin/mailman/ 为 Apache 主机, 这意味着您可以在HTTP访问 http://
service apache2 restart
service mailman start
11.安装PureFTPd和Quota
apt-get install pure-ftpd-common pure-ftpd-mysql quota quotatool
编辑文件:
nano /etc/default/pure-ftpd-common
像下面的设置:
[...]
STANDALONE_OR_INETD=standalone
[...]
VIRTUALCHROOT=true
[...]
现在,我们配置PureFTPd允许FTP和TLS会话。 FTP是一个非常不安全的协议,因为所有的密码和所有数据以明文传输。通过使用TLS,整个通信可以被加密,因此FTP使得安全得多。
如果你希望允许FTP和TLS会话,运行:
echo 1 > /etc/pure-ftpd/conf/TLS
为了使用TLS,我们必须创建一个SSL证书。我在/ etc/ SSL/私营/创建它,所以我首先创建一个目录:
mkdir -p /etc/ssl/private/
然后,如下我们可以生成SSL证书:
openssl req -x509 -nodes -days 7300 -newkey rsa:2048 -keyout /etc/ssl/private/pure-ftpd.pem -out /etc/ssl/private/pure-ftpd.pem
Country Name (2 letter code) [AU]: <-- Enter your Country Name (e.g., "DE"). State or Province Name (full name) [Some-State]:<-- Enter your State or Province Name. Locality Name (eg, city) []:<-- Enter your City. Organization Name (eg, company) [Internet Widgits Pty Ltd]:<-- Enter your Organization Name (e.g., the name of your company). Organizational Unit Name (eg, section) []:<-- Enter your Organizational Unit Name (e.g. "IT Department"). Common Name (eg, YOUR name) []:<-- Enter the Fully Qualified Domain Name of the system (e.g. "server1.example.com"). Email Address []:<-- Enter your Email Address.更改SSL证书的权限:chmod 600 /etc/ssl/private/pure-ftpd.pem
然后重新启动ProFTPd:
service pure-ftpd-mysql restart
编辑:Edit /etc/fstab
nano /etc/fstab
设置如以下设置:
# /etc/fstab: static file system information.
#
# Use ‘blkid’ to print the universally unique identifier for a
# device; this may be used with UUID= as a more robust way to name devices
# that works even if disks are added and removed. See fstab(5).
#
#
# /boot was on /dev/sda1 during installation
UUID=39762f15-3a49-4982-add3-139d5040b48a /boot ext2 defaults 0 2
/dev/mapper/server1–vg-swap_1 none swap sw 0 0
/dev/fd0 /media/floppy0 auto rw,user,noauto,exec,utf8 0 0
要启用quota,运行以下命令:
mount -o remount /
quotacheck -avugm
quotaon -avug
它会显示以下的输出:
root@server1:~# quotacheck -avugm
quotacheck: Scanning /dev/mapper/server1--vg-root [/] done
quotacheck: Cannot stat old user quota file //quota.user: No such file or directory. Usage will not be subtracted.
quotacheck: Cannot stat old group quota file //quota.group: No such file or directory. Usage will not be subtracted.
quotacheck: Cannot stat old user quota file //quota.user: No such file or directory. Usage will not be subtracted.
quotacheck: Cannot stat old group quota file //quota.group: No such file or directory. Usage will not be subtracted.
quotacheck: Checked 11642 directories and 81307 files
quotacheck: Old file not found.
quotacheck: Old file not found.
root@server1:~# quotaon -avug
/dev/mapper/server1--vg-root [/]: group quotas turned on
/dev/mapper/server1--vg-root [/]: user quotas turned on
12. 安装 BIND DNS Server
apt-get install bind9 dnsutils haveged
13. 安装 Vlogger, Webalizer,和 AWstats
apt-get install vlogger webalizer awstats geoip-database libclass-dbi-mysql-perl
配置文件:
nano /etc/cron.d/awstats
#MAILTO=root
#*/10 * * * * www-data [ -x /usr/share/awstats/tools/update.sh ] && /usr/share/awstats/tools/update.sh
# Generate static reports:
#10 03 * * * www-data [ -x /usr/share/awstats/tools/buildstatic.sh ] && /usr/share/awstats/tools/buildstatic.sh
14. 安装 Jailkit
apt-get install build-essential autoconf automake1.11 libtool flex bison debhelper binutils
cd /tmp
wget http://olivier.sessink.nl/jailkit/jailkit-2.19.tar.gz
tar xvfz jailkit-2.19.tar.gz
cd jailkit-2.19
./debian/rules binary
cd ..
dpkg -i jailkit_2.19-1_*.deb
rm -rf jailkit-2.19*
15. 安装 fail2ban 和 UFW
apt-get install fail2ban
配置文件:
nano /etc/fail2ban/jail.local
[pureftpd]
enabled  = true
port     = ftp
filter   = pureftpd
logpath  = /var/log/syslog
maxretry = 3
[dovecot-pop3imap]
enabled = true
filter = dovecot-pop3imap
action = iptables-multiport[name=dovecot-pop3imap, port="pop3,pop3s,imap,imaps", protocol=tcp]
logpath = /var/log/mail.log
maxretry = 5
[postfix-sasl]
enabled  = true
port     = smtp
filter   = postfix-sasl
logpath  = /var/log/mail.log
maxretry = 3
nano /etc/fail2ban/filter.d/pureftpd.conf
[Definition]
failregex = .*pure-ftpd: \(.*@
ignoreregex =
nano /etc/fail2ban/filter.d/dovecot-pop3imap.conf
[Definition]
failregex = (?: pop3-login|imap-login): .*(?:Authentication failure|Aborted login \(auth failed|Aborted login \(tried to use disabled|Disconnected \(auth failed|Aborted login \(\d+ authentication attempts).*rip=(?P
ignoreregex =
echo "ignoreregex =" >> /etc/fail2ban/filter.d/postfix-sasl.conf
service fail2ban restart
apt-get install ufw
16. 安装 Roundcube Webmail
apt-get install roundcube roundcube-core roundcube-mysql roundcube-plugins roundcube-plugins-extra javascript-common libjs-jquery-mousewheel php-net-sieve tinymce
安装过程中的问题:
Configure database for roundcube with dbconfig-common? <-- YesMySQL application password for roundcube: <-- Press enter配置文件:nano /etc/apache2/conf-enabled/roundcube.conf
# Those aliases do not work properly with several hosts on your apache server
# Uncomment them to use it or adapt them to your configuration
Alias /roundcube /var/lib/roundcube
[...]

AddType application/x-httpd-php .php
[...]
service apache2 restart
然后编辑RoundCube的config.inc.php配置文件:
nano /etc/roundcube/config.inc.php
修改:
$config['default_host'] = 'localhost';
17. 安装 ISPConfig 3
cd /tmp
wget -O ispconfig.tar.gz https://git.ispconfig.org/ispconfig/ispconfig3/repository/archive.tar.gz?ref=stable-3.1
tar xfz ispconfig.tar.gz
cd ispconfig3*/install/
php -q install.php
# php -q install.php
--------------------------------------------------------------------------------
_____ ___________ _____ __ _ ____
|_ _/ ___| ___ \ / __ \ / _(_) /__ \
| | \ `--.| |_/ / | / \/ ___ _ __ | |_ _ __ _ _/ /
| | `--. \ __/ | | / _ \| '_ \| _| |/ _` | |_ |
_| |_/\__/ / | | \__/\ (_) | | | | | | | (_| | ___\ \
\___/\____/\_| \____/\___/|_| |_|_| |_|\__, | \____/
__/ |
|___/
--------------------------------------------------------------------------------
>> Initial configuration
Operating System: Debian 8.0 (Jessie) or compatible
Following will be a few questions for primary configuration so be careful.
Default values are in [brackets] and can be accepted with .
Tap in "quit" (without the quotes) to stop the installer.
Select language (en,de) [en]: <-- Hit EnterInstallation mode (standard,expert) [standard]: <-- Hit EnterFull qualified hostname (FQDN) of the server, eg server1.domain.tld [server1.canomi.com]: <-- Hit EnterMySQL server hostname [localhost]: <-- Hit EnterMySQL server port [3306]: <-- Hit EnterMySQL root username [root]: <-- Hit EnterMySQL root password []: <-- Enter your MySQL root passwordMySQL database to create [dbispconfig]: <-- Hit EnterMySQL charset [utf8]: <-- Hit EnterConfiguring PostgreyConfiguring PostfixGenerating a 4096 bit RSA private key.......................................................................++........................................................................................................................................++writing new private key to 'smtpd.key'-----You are about to be asked to enter information that will be incorporatedinto your certificate request.What you are about to enter is what is called a Distinguished Name or a DN.There are quite a few fields but you can leave some blankFor some fields there will be a default value,If you enter '.', the field will be left blank.-----Country Name (2 letter code) [AU]: <-- Enter 2 letter country codeState or Province Name (full name) [Some-State]: <-- Enter the name of the stateLocality Name (eg, city) []: <-- Enter your cityOrganization Name (eg, company) [Internet Widgits Pty Ltd]: <-- Enter company name or press enterOrganizational Unit Name (eg, section) []: <-- Hit EnterCommon Name (e.g. server FQDN or YOUR name) []: <-- Enter the server hostname, in my case: server1.example.comEmail Address []: <-- Hit EnterConfiguring MailmanConfiguring DovecotConfiguring SpamassassinConfiguring AmavisdConfiguring GetmailConfiguring BINDConfiguring JailkitConfiguring PureftpdConfiguring ApacheConfiguring vloggerConfiguring Metronome XMPP Serverwriting new private key to 'localhost.key'-----Country Name (2 letter code) [AU]: <-- Enter 2 letter country codeLocality Name (eg, city) []: <-- Enter your cityOrganization Name (eg, company) [Internet Widgits Pty Ltd]: <-- Enter company name or press enterOrganizational Unit Name (eg, section) []: <-- Hit EnterCommon Name (e.g. server FQDN or YOUR name) [server1.canomi.com]: <-- Enter the server hostname, in my case: server1.example.comEmail Address []: <-- Hit EnterConfiguring Ubuntu FirewallConfiguring Fail2ban[INFO] service OpenVZ not detectedConfiguring Apps vhostInstalling ISPConfigISPConfig Port [8080]:Admin password [admin]:Do you want a secure (SSL) connection to the ISPConfig web interface (y,n) [y]: <-- Hit EnterGenerating RSA private key, 4096 bit long modulus.......................++................................................................................................................................++e is 65537 (0x10001)You are about to be asked to enter information that will be incorporatedinto your certificate request.What you are about to enter is what is called a Distinguished Name or a DN.There are quite a few fields but you can leave some blankFor some fields there will be a default value,If you enter '.', the field will be left blank.-----Country Name (2 letter code) [AU]: <-- Enter 2 letter country codeState or Province Name (full name) [Some-State]: <-- Enter the name of the stateLocality Name (eg, city) []: <-- Enter your cityOrganization Name (eg, company) [Internet Widgits Pty Ltd]: <-- Enter company name or press enterOrganizational Unit Name (eg, section) []: <-- Hit EnterCommon Name (e.g. server FQDN or YOUR name) []: <-- Enter the server hostname, in my case: server1.example.comEmail Address []: <-- Hit EnterPlease enter the following 'extra' attributesto be sent with your certificate requestA challenge password []: <-- Hit EnterAn optional company name []: <-- Hit Enterwriting RSA keyConfiguring DBServerInstalling ISPConfig crontabno crontab for rootno crontab for getmailDetect IP addressesRestarting services ...Installation completed.
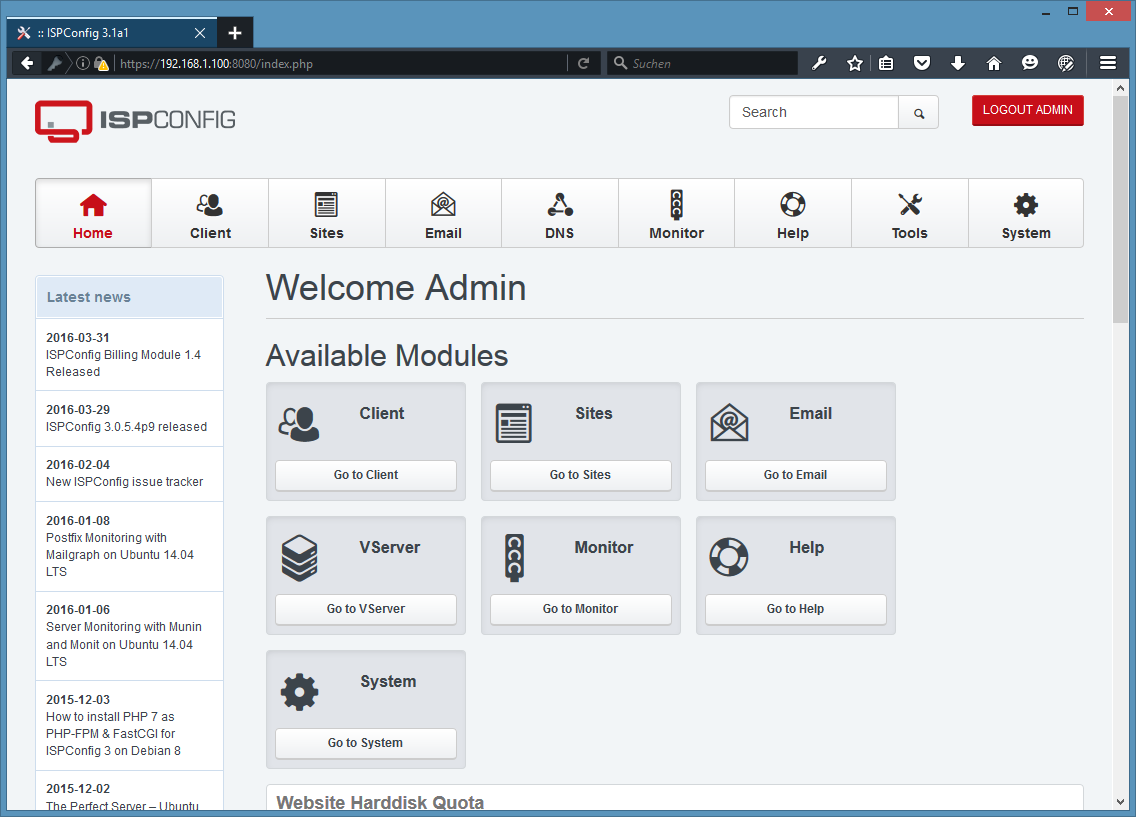
访问 ISPConfig 3 under http(s)://server1.example.com:8080/ or http(s)://192.168.1.100:8080/
18.其他注意事项
18.1 OpenVZ
如果你刚刚建立本教程中的Ubuntu的服务器是OpenVZ的容器(虚拟机),你应该这样做在主机系统上(我假设OpenVZ的容器的ID是101 - 与更换您的系统上正确VPSID):
VPSID=101
for CAP in CHOWN DAC_READ_SEARCH SETGID SETUID NET_BIND_SERVICE NET_ADMIN SYS_CHROOT SYS_NICE CHOWN DAC_READ_SEARCH SETGID SETUID NET_BIND_SERVICE NET_ADMIN SYS_CHROOT SYS_NICE
do
  vzctl set $VPSID --capability ${CAP}:on --save
done
18.2本教程的虚拟机映像下载
本教程可作为准备OVF/ OVA格式,与VMware和VirtualBox虚拟兼容使用虚拟机映像。虚拟机映像使用下列登录信息:
SSH / Shell Login
Username: administrator
Password: howtoforge
This user has sudo rights.
ISPConfig Login
Username: admin
Password: howtoforge
MySQL Login
Username: root
Password: howtoforge
虚拟机的IP是192.168.1.100,它可以在文件 /etc/network/interfaces。请更改上述所有密码来保护虚拟机。
19.相关连接:
Ubuntu: http://www.ubuntu.com/
ISPConfig: http://www.ispconfig.org/
本文链接地址:打造 Ubuntu 16.04 完美服务器
联系客服

