
To begin programming with the Interactive Brokers API, it is first essential to understand the API information exchange. Our program will be broken up into nine parts:
1) Import statements: This section defines the classes we will import from relative locations in the file tree.
2) Global Variables: These will be used to store and access values throughout the program.
3) Custom classes and methods: These classes and methods will be created as we go along in the program on an as-needed basis.
4) TestWrapper Class: This class implements EWrapper Interface and handles the returns from our server requests. In other words, this is the GET part of the information exchange. This is where we will receive and handle information from the TWS by overriding API functions.
5) TestClient Class: This class implements the ClientSocket and sends the request we will make to the server. This is the POST part of the information exchange. In this section, we will invoke functions to send messages to the TWS.
6) TestApp: Where we will establish environmental variables, algorithm preferences, and initialize the program.
7) Execution: The call to program start and begin the algorithm
8) Input area: Where we connect to an input source and receive incoming information
9) Processing area: Where we will interpret the input source and deliver our decision to the correct Interactive Brokers object.
Throughout this tutorial, the code will be written in a file named ibProgram1.py. Here we will add the major program components and reference the API files.
Let’s start by outlining the structure with comments. With many advanced programs, organization and functions can quickly get out of hand, so it is good practice to leave comments as you go along (Code 3.0).
To inherit the necessary classes and functions from the API interfaces, we will need to manually import everything at the top of the program. To avoid redundancy and errors down the line, we will do a star import for now to get known functions. Generally, star imports are not recommended due to their performance issues with large files; however, for our purposes, star imports are quick enough and it’s easy to revise later on after you discover the needs of your program and begin optimizing.
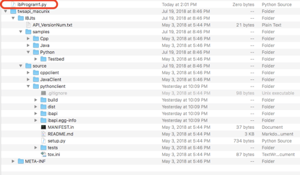
Note, at this point, if you are getting path errors then make sure you have the API files and main ibProgram1.py file set up as below (Figure 3.0). We are using dependent selectors to target the files in the IB API folder so your file tree must be set up accordingly.

Now inside ibProgram1.py, we will import the necessary files from the API folder. We are implementing the wrapper, client, contract, and order object from the API files then importing queue, datetime, and time from the Python package (Code 3.1).
As we work through the program, you will understand exactly how each of these will be implemented. But for now, it’s helpful to get the anticipated imports out of the way so we don’t need to continually backtrack during our program.
Now we will set up the test wrapper to handle the incoming messages from the IB server. This class is where we have the power to override the default return methods and process information in a structure that is easy to access. To clarify, the methods added in the TestWrapper class specifically manipulate and process returned information.
Our first step is to create the class signature of TestWrapper and pass the EWrapper interface (Code 3.2).
Now inside this class, we will start by creating methods to handle returned errors. The server will communicate with your code primarily through these error code methods. Every CLI message comes through labeled as an error. The error codes can return several types of notices. The notices range from simple errors such as a broken pipeline (telling us our connection is faulty), to timeout expirations, or order completion success messages.
The first method, init_error() is the beginning step in the process of storing messages (Code 3.3). This method initializes a Python queue that we can write to later. After the queue is created, it is stored inside the instance of the class. By using self.my_errors_queue, we can access the properties of the TestWrapper class.
Next, create an is_error method to check the state of the queue and evaluate whether a message was returned. If self.my_errors_queue is not empty (meaning there is an error inside) then the is_error should return a true boolean. The value of this boolean will then be stored in the error_exist variable that we can access later.
The third method, get_error uses the is_error boolean value from the error_exist variable to get messages from the queue if they exist (Code 3.5). If no errors are present then get_error will return nothing. Note: there is a timeout and try/except. If you would like to receive a message every time an exception is raised, you can add a printout or return in the exception.
Finally, we will override the error method in the API files to produce a message that is easier to read. Rewriting the returned message string can help us better interpret the value in the console and will make the debugging process a little easier.
The error method will create a string from the Trader Work Station (TWS) return values and push it onto the my_errors_queue that we created in the first method (Code 3.6). This code snippet also includes all the previous error handling methods created for clarity.
After the implementation of these four methods, your program is all set up to handle errors. Errors are pushed from the server, not directly invoked by our application. So, we only need to add the methods here in the wrapper. Remember that the application is being built on top of the Interactive Brokers API so many of the behind the scenes work is being handled by their program.
In the following examples in this guide, communication with the server will be handled in the client class and a return will be received in the wrapper class (the class we just wrote to). This is an important concept to grasp:
Now that error handling has been set up and we are gaining some familiarity with the API, we will add methods responsible for accepting more robust messages from the server. The simplest example to prove we have established a connection is to ask for the server time.
The pattern of an invoking step in the Client Class and receiving step in the Wrapper Class that we set up with time will be a common theme throughout all types of messages.
Below our error methods, still inside the TestWrapper class, we will store the time values. Just like with the error messages, we will begin with an init method that initializes a queue (Code 3.7). The queue is assigned to the variable time_queue. The variables act as a temporary holder that immediately assigns the queue to a class instance and returns the queue structure (you can make this more compact and Pythonic, but for clarity, it is left in the long-form).
Since the time queue is stored as an instance of the class, we can access the values in another method called currentTime. This is an overridden wrapper method and allows us to place the value in server_time (our newly created queue) (Code 3.8).
Now that we have a place to handle and store our errors and time, we can move to the TestClient to send the requests.
The TestClient class is used by the API to send messages to the server. In this class, we do not override the methods like in the TestWrapper. The TestClient is just used to invoke messages and requests.
To begin we must implement the wrapper as a constructor of the TestClient. This is necessary to start handling the returned messages. The socket needs to be initialized to an instance of the wrapper and an _init_ method is used to facilitate this interaction (Code 3.9).
After creating the constructor, we will declare our method to invoke a time request from the server (Code 3.10). The first line is a print message to the console indicating that our function has run.
Note: When creating functions and testing for the first time, it is helpful to debug via print messages. Print messages will be used throughout our program to communicate testing milestones and check the stored value in a variable at a certain point in time. Feel free to omit or add any print statements that are just quoted messages. Print statements that call methods can also be moved, but the method must still be called in some way.
Next, we will initialize the queue to handle the return before we make a request. This is done by calling the init_time function that was created in the wrapper.
The third line, self.reqCurrentTime(), is the most critical aspect of this TestClient class. The TestClient is responsible for sending the official request for information to the TWS. In this case, the request is invoked with the line self.reqCurrentTime().
Following the server request, a max timeout is declared (Code 3.11). Timeouts are a good practice to follow for any request to the server since Interactive Brokers can be slow to connect at times. In some cases, requests to the server may experience an error without any clear feedback to the tester. In this way, we watch for any lack of error messages by including the timeout on the queue’s get request. This can be handled inside a try & except condition (Code 3.11, Line 14).
Finally, a while loop checks for errors stored from the get_error method created in the wrapper class. The loop prints any return values identified. On the case there is no error, the server_clock method will skip the loop and just return a value of time that we will print in our execution area. At this stage, confirm your TestClient class looks very similar to Code 3.11. These client methods set us up to move forward to the third main IB API class, TestApp.
The TestApp class is where environment conditions are established. When creating the app in the program execution section, we call TestApp to initialize all the classes. This class is called before every other method in our program, directly after the program is started.
TestApp is primarily used to implement the TestWrapper and TestClient classes and begins the server connection.
Every execution inside the TestApp is encapsulated within an init method (Code 3.12). The program begins by initializing the wrapper and client then starting a connection to the TWS. This is done with the EClientSocket object, connect(). This starts a TCP connection to the OS with the specified IP address and port number. If a connection can not be opened then a 502 error code is returned. This code usually indicates an incorrect IP address or the TWS not being open and running on the host computer.
At program execution, essential information is exchanged to ensure the connection between the TWS server and the client. This information includes program versions, sync preferences, and security access.
After connection, execution threads are established. By default, there are two threads of execution, one outbound from the client and a second thread for adding messages to the queues in the wrapper. The EReader thread is responsible for reading and parsing data from our threads. In the Python version of the API, the EReader is initialized and started within the EClientSocket(connect()) so we won’t have to worry about this in our program. In other languages, however, this will need to be created separately and you can refer to the documentation for instructions. The TestApp then starts the execution threads and begins the proper connection.
As the final part of the TestApp class, we will call the init_error from the wrapper class to begin listening for any problems.
The TestClient and TestWrapper class are now ready to send and receive communications to server! The final step is to run the program.
The final step in our first program is to begin executing the functions when the program is started in the terminal.
Since we are running ibProgram1.py as our main file, we want it to execute only when it is called and we run this specific module, not whenever there is an import reference to it. In our case this may not be totally necessary; however, as you begin to develop more advanced algorithms, it is good practice to check when you want to execute certain code blocks. So we add Line 3 from Code 3.13 to be safe.
If you run “python3 ibProgram.py” in the terminal, this will set __name__ = “__main__” to true and execute the code inside (Code 3.13). We use this to initialize the application and store a reference inside the app variable.
The TestApp parameters specify the IP address, port number, and clientId of the TWS. In our case, we are running the TWS and program on localhost, IP 127.0.0.1. For the second parameter, the TWS is set to paper trading mode which is port 7497. If you are using a live trading account make sure to update this to 7496 (you can find the port in preferences).
The clientId is now set to 0 (which is ignored as part of the TWS).
After the initialization of the program on Line 8, Code 3.13, we can follow up with the developed methods. A start of program message is printed to confirm TestApp responded successfully then the client method server_clock is called.
Server_clock is referenced as an instance of TestApp and the return message (the Unix time) is stored in a variable called requested_time to be printed later.
Finally, we disconnect the application as a signal that we have completed the connection. This step is non-critical and will be removed later as we develop an algorithm that is constantly listening for inputs; however, it is helpful to see a closed connection at this stage.
Note: If you receive error messages relating to an inability of close type of app, then this step can be removed and you can manually end the program in the terminal.
To start testing the program on your local machine, open the command terminal and navigate to the home folder where ibProgram1.py is saved (Figure 3.1). Open the Trader Work Station and keep that running in the background as we execute the program.
Note: You will receive errors of a broken pipe if the Trader Work Station is not actively running and ready to communicate.

In the terminal, run “python3 ibProgram1.py” and hit enter (Figure 3.2). This will start the program and if the instructions were completed correctly, your output will look similar to below:

The program prints “the program has begun” from the program execution area, then a print message is returned from the server_clock method, there is a list of messages returned from the error method in the TestWrapper class, and then the time is returned.
Despite the error messages, this is actually a complete and properly functioning program. The error codes were received were of type 2104 and 2106 which represent success.
Remember, Interactive Brokers uses the error interface to communicate with the user in all cases; in this example, it is indicating that we have properly connected to the data services that are part of the TWS.
If you click “Data” in the top right corner of the TWS, you will see the pipes of data connection that we can make for market data (Figure 3.3).

Note: In certain cases, if the program is running without a printout and/or returns a broken pipe error then you will need to head over to the TWS and click a pop-up to accept incoming connections. For other broken pipeline errors, check that your preferences match according to Chapter 2 and you have the correct IP address and port in the code.
If everything works then congratulations on your first Interactive Brokers program!
We have successfully created a program that sends a request to the server and receives a reply. Although the return is simplistic, it indicates a proper connection to the TWS and the setup of the classes and methods we’ve developed, allows us to create a more advanced program in the following sections.
Feel free to tackle the next step in this series if you’re ready!
联系客服

